Today I changed the sidelights and main beam for white upgrades no problem, however I cannot get the dipped bulbs to come out?
I've tried to turn that black casing but nothing happens when it does turn I've tried pulling etc...
Really annoying, as the others were easy, I just can't get my hands into the housing to even access that black box holder, cuts your hands to bits lol
Any help would be great thanks
HELP! How do you change the dipped Headlight Bulbs?
-
RW1

- Legend
- Posts: 4680
- Joined: Tue Jul 07, 2009 9:06 pm
- I drive a: 1.4 TSI 160
- In: Candy White
- With a: DSG box
Re: HELP! How do you change the dipped Headlight Bulbs?
There's nothing special. Turn the black plastic fin which will be in a vertical position anti-clockwise (looking at it from inside headlight end) until it becomes loose (about 25 -30 degrees turn). The bulb holder & headlight bulb will then almost fall out.
C.
C.
Week 43 Build has happened on time! 22 Oct'09 Scirocco is at Check Point 5 in the factory
23 Oct'09 Now Complete on the dockside, 24 Oct'09 Sailed from Portugal, 27 Oct'09 In the UK,
29 Oct'09 at dealers Driving 4th Nov. Sorted!
23 Oct'09 Now Complete on the dockside, 24 Oct'09 Sailed from Portugal, 27 Oct'09 In the UK,
29 Oct'09 at dealers Driving 4th Nov. Sorted!
-
Markob27
- Posts: 6
- Joined: Thu Feb 02, 2012 7:39 pm
- I drive a: GT 2.0 TSI
- In: Deep Black
- With a: Manual box
Re: HELP! How do you change the dipped Headlight Bulbs?
I've tried this and it does become loose but still does not pull out?
Is there a how to guide on here anywhere?
Thanks
Is there a how to guide on here anywhere?
Thanks
-
RW1
- Legend
- Posts: 4680
- Joined: Tue Jul 07, 2009 9:06 pm
- I drive a: 1.4 TSI 160
- In: Candy White
- With a: DSG box
Re: HELP! How do you change the dipped Headlight Bulbs?
Guide .... no as its so simple.
If it comes loose, just gently wiggle it backwards very slowly. You must turn it anti-clockwise as above angle as far as it will go.
C.
If it comes loose, just gently wiggle it backwards very slowly. You must turn it anti-clockwise as above angle as far as it will go.
C.
Week 43 Build has happened on time! 22 Oct'09 Scirocco is at Check Point 5 in the factory
23 Oct'09 Now Complete on the dockside, 24 Oct'09 Sailed from Portugal, 27 Oct'09 In the UK,
29 Oct'09 at dealers Driving 4th Nov. Sorted!
23 Oct'09 Now Complete on the dockside, 24 Oct'09 Sailed from Portugal, 27 Oct'09 In the UK,
29 Oct'09 at dealers Driving 4th Nov. Sorted!
-
Markob27
- Posts: 6
- Joined: Thu Feb 02, 2012 7:39 pm
- I drive a: GT 2.0 TSI
- In: Deep Black
- With a: Manual box
Re: HELP! How do you change the dipped Headlight Bulbs?
It's just not happening!!
Can't turn anymore than I have already, it just doesn't come out!
Can't turn anymore than I have already, it just doesn't come out!
-
RW1
- Legend
- Posts: 4680
- Joined: Tue Jul 07, 2009 9:06 pm
- I drive a: 1.4 TSI 160
- In: Candy White
- With a: DSG box
Re: HELP! How do you change the dipped Headlight Bulbs?
Both sides?
C.
C.
Week 43 Build has happened on time! 22 Oct'09 Scirocco is at Check Point 5 in the factory
23 Oct'09 Now Complete on the dockside, 24 Oct'09 Sailed from Portugal, 27 Oct'09 In the UK,
29 Oct'09 at dealers Driving 4th Nov. Sorted!
23 Oct'09 Now Complete on the dockside, 24 Oct'09 Sailed from Portugal, 27 Oct'09 In the UK,
29 Oct'09 at dealers Driving 4th Nov. Sorted!
-
Markob27
- Posts: 6
- Joined: Thu Feb 02, 2012 7:39 pm
- I drive a: GT 2.0 TSI
- In: Deep Black
- With a: Manual box
Re: HELP! How do you change the dipped Headlight Bulbs?
Lol
I didn't realise there was three rubber caps on the inside of headlight!!
I was trying the middle one thinking it was the dipped, then I saw the one behind the wing!
It's deceiving if you don't know about it.
What is the middle one for?
Anyway all done, and your right easy job lol
Thanks
I didn't realise there was three rubber caps on the inside of headlight!!
I was trying the middle one thinking it was the dipped, then I saw the one behind the wing!
It's deceiving if you don't know about it.
What is the middle one for?
Anyway all done, and your right easy job lol
Thanks
-
RW1
- Legend
- Posts: 4680
- Joined: Tue Jul 07, 2009 9:06 pm
- I drive a: 1.4 TSI 160
- In: Candy White
- With a: DSG box
Re: HELP! How do you change the dipped Headlight Bulbs?
The middle one is the headlight adjuster motor.
Anyhow, been out and done it again.......
Looking into the right hand side dipped beam rear access hole after the rubber cap is removed. The outer most rubber cap of the three.
The trick is to stand by the wing at the back edge of the left side headlight and face your body forward. Then put your left hand (righthand dipped) into the hole and clasp the plastic "fin" between your 1st and 2nd fingers. Now twist anti-clockwise and it should fall out. Same for the left dipped beam, stand by the left wing at the back edge of the headlight, with your body facing forward and use your right hand. Again grip the plastic "fin" with 1st and 2nd fingers and twist.
The left side is slightly more difficult because the fusebox position nearby.
When refitting, offer up the bulb holder at 25 - 30 off-set anti-clockwise with the electrical contacts on the correct side and insert it into the back of the headlight unit until it is seated. Then twist clockwise until you hear/feel the electrical contacts click home.
C.
You do not have the required permissions to view the files attached to this post.
Week 43 Build has happened on time! 22 Oct'09 Scirocco is at Check Point 5 in the factory
23 Oct'09 Now Complete on the dockside, 24 Oct'09 Sailed from Portugal, 27 Oct'09 In the UK,
29 Oct'09 at dealers Driving 4th Nov. Sorted!
23 Oct'09 Now Complete on the dockside, 24 Oct'09 Sailed from Portugal, 27 Oct'09 In the UK,
29 Oct'09 at dealers Driving 4th Nov. Sorted!
-
Markob27
- Posts: 6
- Joined: Thu Feb 02, 2012 7:39 pm
- I drive a: GT 2.0 TSI
- In: Deep Black
- With a: Manual box
Re: HELP! How do you change the dipped Headlight Bulbs?
Yeah I done it in 5mins just before you posted the how to.
It's easy, just a little confused at that middle one being the adjustment motor, I thought that was the dipped, no wonder I couldn't get it out!
Thanks anyway for your guide.
It's easy, just a little confused at that middle one being the adjustment motor, I thought that was the dipped, no wonder I couldn't get it out!
Thanks anyway for your guide.
-
VWRed
- Posts: 4
- Joined: Fri Jun 01, 2012 9:26 pm
- I drive a: 1.4 TSI 160
- In: Salsa Red
- With a: Manual box
- Location: East London
Re: HELP! How do you change the dipped Headlight Bulbs?
RW1 it wasn't a waste of time, I found your guide really helpful. I work with computers, which I can take apart easily...cars are a different matter! I had found the bits, but didn't have the confidence to twist hard enough. So a big thank you from me!
That guide deserves a post of its own, because although it's easy for most people, it still gives confidence to those that aren't sure.
Regards,
Dave
That guide deserves a post of its own, because although it's easy for most people, it still gives confidence to those that aren't sure.
Regards,
Dave
-
RW1
- Legend
- Posts: 4680
- Joined: Tue Jul 07, 2009 9:06 pm
- I drive a: 1.4 TSI 160
- In: Candy White
- With a: DSG box
Re: HELP! How do you change the dipped Headlight Bulbs?
Thanks. DoneVWRed wrote:That guide deserves a post of its own, because although it's easy for most people, it still gives confidence to those that aren't sure.
http://www.sciroccocentral.co.uk/roccop ... light_bulb" onclick="window.open(this.href);return false;
C.
Week 43 Build has happened on time! 22 Oct'09 Scirocco is at Check Point 5 in the factory
23 Oct'09 Now Complete on the dockside, 24 Oct'09 Sailed from Portugal, 27 Oct'09 In the UK,
29 Oct'09 at dealers Driving 4th Nov. Sorted!
23 Oct'09 Now Complete on the dockside, 24 Oct'09 Sailed from Portugal, 27 Oct'09 In the UK,
29 Oct'09 at dealers Driving 4th Nov. Sorted!
-
dadavies90
- Posts: 40
- Joined: Wed Jan 11, 2012 1:35 pm
- I drive a: 1.4 TSI 160
- In: Candy White
- With a: Manual box
Re: HELP! How do you change the dipped Headlight Bulbs?
Hi, sorry to hijack the post but could do with a little help please. You know the bulb holder that comes out with the bulb on the dipped lights? Can you get replacement ones of these as my holder seems to have melted and I'm having problems with the bulb cutting out.
A part number for the bulb holder would be great or just advice on we're to get one from please?
Many Thanks.
A part number for the bulb holder would be great or just advice on we're to get one from please?
Many Thanks.
-
RW1
- Legend
- Posts: 4680
- Joined: Tue Jul 07, 2009 9:06 pm
- I drive a: 1.4 TSI 160
- In: Candy White
- With a: DSG box
Re: HELP! How do you change the dipped Headlight Bulbs?
Both sides for the dipped Halogen lamp holders is 5K0 941 109.
Dealer's Parts Dept.
C.
Dealer's Parts Dept.
C.
Week 43 Build has happened on time! 22 Oct'09 Scirocco is at Check Point 5 in the factory
23 Oct'09 Now Complete on the dockside, 24 Oct'09 Sailed from Portugal, 27 Oct'09 In the UK,
29 Oct'09 at dealers Driving 4th Nov. Sorted!
23 Oct'09 Now Complete on the dockside, 24 Oct'09 Sailed from Portugal, 27 Oct'09 In the UK,
29 Oct'09 at dealers Driving 4th Nov. Sorted!
-
dadavies90
- Posts: 40
- Joined: Wed Jan 11, 2012 1:35 pm
- I drive a: 1.4 TSI 160
- In: Candy White
- With a: Manual box
Re: HELP! How do you change the dipped Headlight Bulbs?
Superb, thanks mate. Now got a new holder and all is fine with the lights again. Thanks again.
 Re: HELP! How do you change the dipped Headlight Bulbs?
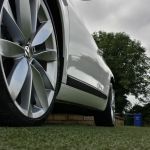
Just been through the learning curve to swap out the dipped headlight bulbs, to Phillips 130 Extremes, (I hope they are better than the dim brown candles previously fitted.)
On the offside it took over 30mins to change the bulb with much swearing and grazed fingers.
After a little internet research (and a fish finger butty) the solution to the access difficulties was found: A small slotted wooden block.
The wooden block, gives you the access and the leverage required. I guess it would work with domestic plumbing waste pipe too.
The nearside bulb was changed in less than 2 mins from start to finish!
See pic in link below....Good job I passed my o'level woodwork :-)
[url]https://www.flickr.com/photos/1295 ... 879617026/[/url]
Last edited by fet on Tue Dec 02, 2014 10:30 pm, edited 1 time in total.
-
whiteDevil_170
- Posts: 2753
- Joined: Sat Sep 17, 2011 5:39 pm
- I drive a: GT 2.0 TDI 170/184
- In: Candy White
- With a: Manual box
- Location: Oxfordshire
Re: HELP! How do you change the dipped Headlight Bulbs?
Really that long? I can do both dipped in less than 5 mins easilyfet wrote:Just been through the learning curve to swap out the dipped headlight bulbs, to Phillips 130 Extremes, (I hope they are better than the dim brown candles previously fitted.)
On the offside it took over 30mins to change the bulb with much swearing and grazed fingers.
After a little internet research (and a fish finger butty) the solution to the access difficulties was found: A small slotted wooden block.
the wooden block, gives you the access and the leverage required. I guess it would work with domestic plumbing waste pipe too.
The nearside bulb was changed in less than 2 mins from start to finish!
See pic in link below....Good job I passed my o'level woodwork :-)
[url]https://www.flickr.com/photos/1295 ... 879617026/[/url]
Jack
 Lets Roc
-
Paj13
- Posts: 1
- Joined: Tue Mar 24, 2015 3:46 pm
- I drive a: 2.0 TDI 140
- In: Candy White
- With a: Manual box
Re: HELP! How do you change the dipped Headlight Bulbs?
thanks guys, just joined the forum to work out how to change the bulb, once i had the instruction completed the job in 5 mins, perfect 

-
DanWakefieldWF3
- Posts: 6
- Joined: Tue Dec 22, 2015 5:57 pm
- I drive a: GT 2.0 TDI 140/150
- In: Indium Grey
- With a: DSG box
Re: HELP! How do you change the dipped Headlight Bulbs?
I've had this issue on my new 65 plate scirocco, couldn't get my hand into the light to twist the cap so, made this "key" and it worked a treat.
Put it on the back of the bulb holder and twist....
Put it on the back of the bulb holder and twist....
You do not have the required permissions to view the files attached to this post.
-
House

- Posts: 46
- Joined: Fri Oct 23, 2015 8:51 pm
- I drive a: GT 2.0 TSI
- In: Indium Grey
- With a: DSG box
Re: HELP! How do you change the dipped Headlight Bulbs?
Brilliant idea!! I couldn't undo the bulb holder no matter how much I tried. Found this post, and made the "key", makes it so much easier! Thanks for the idea.DanWakefieldWF3 wrote:I've had this issue on my new 65 plate scirocco, couldn't get my hand into the light to twist the cap so, made this "key" and it worked a treat.
Put it on the back of the bulb holder and twist....
-
rosshunterduffy
- Posts: 1
- Joined: Fri Jul 01, 2022 3:20 pm
Re: HELP! How do you change the dipped Headlight Bulbs?
I cannot get the passenger side bulb out. It's so awkward. Driver's side came out no bother!
Been racking my brain the past couple of days and trying various tools but nothing is working. Not sure how the 'key' above would work as it doesn't seem like there would be enough room to fit it in??
Help
Been racking my brain the past couple of days and trying various tools but nothing is working. Not sure how the 'key' above would work as it doesn't seem like there would be enough room to fit it in??
Help